How to Create a Website with AI in Seconds
- AI Chimes
- Oct 15, 2023
- 9 min read

You've heard the buzz about AI, but did you know it's revolutionizing the way we build websites? Gone are the days of laborious coding and design. With AI, you can create a stunning website in a fraction of the time.
This guide will walk you through the process, from selecting an AI website builder to launching your AI-powered site. And no, you don't need to be a tech wizard to follow along.
While AI simplifies the web-building process, it's crucial to have a clear vision. Know your brand, your audience, and the purpose of your website. This will guide the AI in creating something that's not just quick but also quality driven.
TABLE OF CONTENT
Step #1: Choose Your AI Website Builder
So, you're ready to dive into the world of AI-powered websites. The first step? Picking the right AI website builder.
Review this list of the Top AI Website Builders. Based on your requirements, you might gravitate towards one tool or the other.
In our experience of creating numerous websites, Hostinger is the most feature-rich, reliable and affordable platform. Its AI Website Builder is adept at creating websites, and it is also a versatile tool for creating an online experience that resonates with your brand.
Here's why it stands out:
Automated Website Development: Tell Hostinger your brand name, the type of website you need, and a brief description. The AI takes it from there.
AI-Powered Content Creation: Struggling with what to say? Hostinger's AI can generate SEO-friendly content for you.
Built-in AI Tools: From AI Logo Maker to AI Heatmap, Hostinger offers a range of tools to analyze visitor behavior and even create your brand logo.
SEO Optimized: Hostinger's AI Website Builder is designed to help you rank better on Google. It offers intuitive SEO tools that make optimization a breeze.
E-Commerce ready: If you're planning to sell online, Hostinger offers intuitive e- commerce features. You can manage inventory, accept payments, and even enable appointment bookings.
24/7 Customer Support: Run into a snag? Hostinger has round-the-clock customer support to help you out.
30-Day Money-Back Guarantee: Best of all, it gives your 30 days to decide, full refund guarantee if you are not satisfied with the platform.
So, if you're looking for an AI website builder that offers more than just a basic website, Hostinger could be your go-to platform. It's practical, feature-rich, and designed to grow with you.
In this tutorial, we will use Hostinger as the example platform. And we will cover step-by-step on how you can create within seconds your blog / landing page / e-Commerce website.
Step #2: Choose Your Hosting Plan
Click below to access Hostinger's AI Website Builder
Get Started for Free: On the homepage, look for the option that says 'Get Started for FREE' and click on it.

Tell About Your Site: A prompt will appear asking you to describe your site's purpose and overall presentation. Fill in the details. The more detailed you are, the better the AI can tailor the website to your needs.

Website Creation: After filling in your site details, click 'Create'. The AI will automatically generate a basic version of your website.

Click Full Edit Mode: To unlock more customization options, click on 'Full Edit Mode'.

Buy Hosting: At this point, you'll be prompted to purchase a hosting plan to continue with the full edit mode.

Select a Plan: Click 'Add to Cart' next to the Premium Web Hosting plan to get access to the Hostinger AI Website Builder. Feel free to choose another plan; the AI builder is available on all of them.
Checkout: Enter your email to create an account. You can also use your Google or Facebook account. Complete the payment process.
Step #3: Choose your Domain Name
Access Dashboard: Once your payment is processed, you'll be redirected to your hosting account. Click the 'Setup' button.

Start Building: Click 'Start Now' and then select 'Create a New Website'.
Choose the 'Hostinger Builder with AI' option.

Hostinger gives you the option to skip this step. This is fantastic, as you can build your site, and figure the best name for it later!
Step #4: Create Your Website with AI
AI will do its magic, and create your website within seconds.
Once you have used the AI to generate a basic template, you can unlock the full potential of the website with basic and advanced customization.

Dashboard Overview: Navigate to your dashboard. Here, you'll find various options to add or modify elements like text, images, and even entire sections.
Drag and Drop: Use the drag-and-drop feature to add new elements or rearrange existing ones. Want to add a testimonial section or a photo gallery? Simply drag it from the menu and drop it where you want it on the page.
Theme and Color Scheme: Head over to the 'Design' tab to change the overall theme and color scheme of your website. Make sure it aligns with your brand's identity.
Fonts and Typography: Under the same 'Design' tab, you'll find options to change the fonts and typography. Choose fonts that are easy to read and complement your design.
Advanced Settings: For those who want to go the extra mile, explore the 'Advanced' settings. Here, you can add custom CSS or JavaScript to further tailor your site.
Mobile Responsiveness: Don't forget to check how your site looks on mobile. Toggle between desktop and mobile views to ensure your site is fully responsive.
Pro Tip: Mobile responsiveness is not just a nice-to-have; it's a must. Google factors it into its ranking algorithm.
By taking these steps, you'll have full control over your website's design and functionality. You're not just using AI to build a website; you're using it to build a website that's uniquely yours. So go ahead, flex those creative muscles and make your site stand out!
Step #5: Add e-Commerce Capability (Optional)
If you're looking to sell products online, setting up e-commerce pages is a must. Don't worry, Hostinger's AI Website Builder has got you covered.
Follow Initial Steps: Just like you did for your main website, start by describing your e-commerce store's purpose and overall presentation.
Choose Domain: You'll be prompted to select a domain name. If you already have one, great! If not, you can choose one later.
Select Store Theme: When you reach the design selection step, you'll notice an option for e-commerce store themes. These are specifically designed for online stores, so go ahead and pick one that aligns with your brand.
Pro Tip: You can preview each theme by clicking the 'Previous' button. Make sure the theme you choose complements your products and brand image.
Start Building: Once you've selected a theme, click the 'Start Building' button. This will take you to the website builder interface.
Navigate to Online Store: On the right side of your dashboard, you'll see an 'Online Store' option. Click on it to reveal a host of e-commerce customization options.
Manage Store: Click on 'Manage Store' to be directed to a new page where you can name your store and choose the country you're targeting.
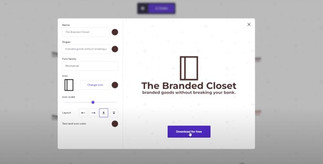
Add Products: This is the fun part. Start adding your products, complete with images, descriptions, and prices.
Payment and Company Info: Last but not least, set up your payment gateway and fill in your company information.
Pro Tip: Make sure to include multiple payment options to cater to a broader audience. Also, ensure your payment gateway is secure to build customer trust.
By following these steps, you'll have a fully functional e-commerce store that's ready to make sales. Whether you're selling handmade crafts or high-tech gadgets, your online store is now equipped to handle it all.
Step #6: Add Blogging Capability (Optional)
If you're looking to share your thoughts, expertise, or simply connect with your audience on a deeper level, adding a blog to your website is a fantastic idea. Here's how to do it with Hostinger's AI Website Builder.
Initial Setup: Just like before, start by describing what your blog will be about. The more specific you are, the better the AI can tailor the blog to your needs.
Choose Domain: You'll be prompted to select a domain name. If you already have one, you can use it here. If not, you can choose one later.
Select Blogging Theme: When you get to the design selection step, look for themes specifically designed for blogging. Pick one that resonates with the tone and style you want for your blog. Preview each theme to see how it looks. Your theme sets the stage for your content, so choose wisely.
Start Building: Once you're happy with your theme, click 'Start Building'. This will take you to the website builder interface.
Edit Your Website: Now that you've chosen a blogging theme, it's time to make it your own. You'll find options to add or edit pages, just like you did for your main website and e-commerce store.
Set Up Key Pages: Don't forget to set up essential pages like 'About Us' and 'Contact Us'. These pages give your blog credibility and provide ways for your audience to connect with you.
Pro Tip: Your 'About Us' page is a great place to share your story and mission. Make it compelling to draw readers into your blog.
By following these steps, you'll have a blog that's not just a collection of articles, but a full-fledged part of your online presence. Whether you're blogging for business or pleasure, you now have a platform to share your voice.
Step #7: Customize with Advanced AI Features (Logo Maker, Heatmap, Content Writer)
A. Craft Your Brand Identity with Hostinger's AI Logo Maker
Navigate to AI Tools: From your dashboard, locate the menu and click on 'AI Tools'. Here,you'll find various AI-based tools, including the AI Logo Maker.
Select AI Logo Maker: Click on the 'AI Logo Maker' option. You'll be redirected to a new page specifically designed for logo creation.

Fill in Brand Details: The page will prompt you for your brand name, slogan, and business domain. Fill in all the information and click 'Start Creating'.
Review Generated Logos: After a few moments, you'll see several AI-generated logo options. Browse through them and pick one that resonates with your brand.


Customize or Download: If you like a logo, you can download it immediately. If not, you have the option to customize it further. Describe Your Logo: For more customization, go to the 'Describe Logo'tab. Here, you can type in a detailed description of your desired logo, specifying elements likeshape, color, icon, or font.
Create and Review: After filling in your description, click 'Create'. Review the new logos generated based on your input.
Finalize and Download: Once you're satisfied with your logo, click on it and select 'Download for Free'.
B. Elevate Your Content: Using Hostinger's AI Writer
Access AI Tools: Head back to the 'AI Tools' menu from your dashboard. This is your one-stop-shop for all AI-powered features.
Choose AI Writer: Among the list of tools,click on 'AI Writer'. This will lead you to a new interface designed for content creation.

Select Topic and Preferences: You'll be prompted to choose a topic and narrow down the subjects you want to cover. This helps the AI generate text that's relevant to your website.
Generate Text: After setting your preferences, click 'Generate Text'. You'll be presented with several versions of AI-generated content to choose from.

Review and Select: Browse through the generated text and select the one that fits your needs. You can copy this text directly into your website's content sections.
Manual Edits: While the AI-generated text is a great starting point, you can (and should) make manual edits to tailor the content to your specific audience.
SEO Optimization: Make sure to include relevant keywords in your content. This will help improve your website's SEO and attract more organic traffic. Pro Tip: Use the AI-generated content as a foundation, but don't forget to add your personal touch. Authenticity goes a long way.
C. Optimize User Experience: With Hostinger's AI Heatmap

Navigate to AI Tools: If you're not already there, go back to the 'AI Tools' menu on your dashboard. This is where the magic happens.
Select AI Heatmap: Among the list of AI tools, you'll find 'AI Heatmap'. Click on it to open a new interface dedicated to heatmap analytics.
Generate Heatmap: Once you're in the AI Heatmap interface, click the button to start generating your site's heatmap. It's that simple.
Analyze Results: The heatmap will use color indicators to show where users are most likely to focus. Red areas indicate high attention, while cooler colors like blue indicate less focus.
Strategic Placement: Use this data to place important elements like CTAs, forms, or key information in areas where they're most likely to get noticed.
Improve Future Pages: The insights you gain from the heatmap can also inform the design and layout of future pages or even new websites.
Step #8: The Final Countdown: Publish Your Website
Review SEO Settings: Hostinger's AI Website Builder comes with built-in SEO settings. Go through the SEO capability to ensure your website is optimized for Search Engines.
Review content and layout: Before you hit that 'Publish' button, make sure you've reviewed every element on your website. Check the text, images, layout, and especially the mobile responsiveness.
Review Mobile Responsiveness: Before publishing, click the mobile icon to simulate your site on a mobile device.
Publish: Once you're satisfied, hit the 'Go Live' button. Your website will be live in a minute or two. You can always go back and make changes even after your site is live.
Test User Experience: Navigate through the website as if you're a first-time visitor. Is the user journey smooth? Are CTAs clearly visible and compelling?
Backup: Always, always backup your website before making it live. This is your safety net in case anything goes wrong during the publishing process. Wait a Moment: It will take a minute or two for your website to be accessible to everyone. Use this time to pat yourself on the back; you've earned it.
Conclusion: Your Digital Journey Begins Now
And there you have it—a step-by-step guide to create a website with AI for free that's not just functional, but exceptional, thanks to Hostinger's suite of AI tools.
From crafting a unique logo to optimizing user experience with a heatmap, you've got the power of AI at your fingertips.
But remember, a creating your website with AI is a living, breathing entity that needs ongoing care. So, keep monitoring, tweaking, and most importantly, updating with fresh content.
Your digital journey has just begun, and the possibilities are endless. So, what are you waiting for? Your audience is out there, eager to see what you've got to offer.
Comments